When it came to wedding stationery, I knew I wanted to keep the costs to a minimum. We had a pretty tight budget for our wedding and there were other things that took priority. And as much as I LOVE good stationery and appreciate a beautiful wedding invitation suite, I knew people would just throw it in the trash right after they opened it. I definitely could not afford exactly what I wanted from a stationer, but I wasn’t willing to sacrifice the look that I wanted. Which led to me creating my own invitations!
I went into creating my own invitations with no graphic design experience at all, so don’t be scared off from DIYing your own invites. If I can do it, chances are so can you. I’m going to go over how I designed mine, which you’ll see I didn’t totally do on my own. The good thing about making your own invitations is you can make them exactly how you want. So the process is only as simple or as complicated as you make it. Hopefully you’ll be able to use some of my tips to make it a little easier.
The Look
The hardest thing, and also the best thing, about creating your own invitations is you need to know exactly what you want them to look like. There’s not a book of styles that you’re choosing from, you’re actually making it from scratch. I suggest browsing Pinterest to get ideas of what you like. Save as many invitations as you want while browsing, and then go back through the ones you saved. Most likely they’ll all have a similar look or something in common. For me, I loved invitations with illustrations of the wedding venue. I thought they were so personalized and unique, but they certainly came with a high price. I decided to find a more affordable way to get the look that I wanted.
The Budget
When you calculate your budget, don’t forget to include the cost of paper, printing, envelopes, and stamps. You’d be surprised how quickly these “little” expenses add up and you need to take that into consideration for what you can spend on you invitation itself.

The Creation
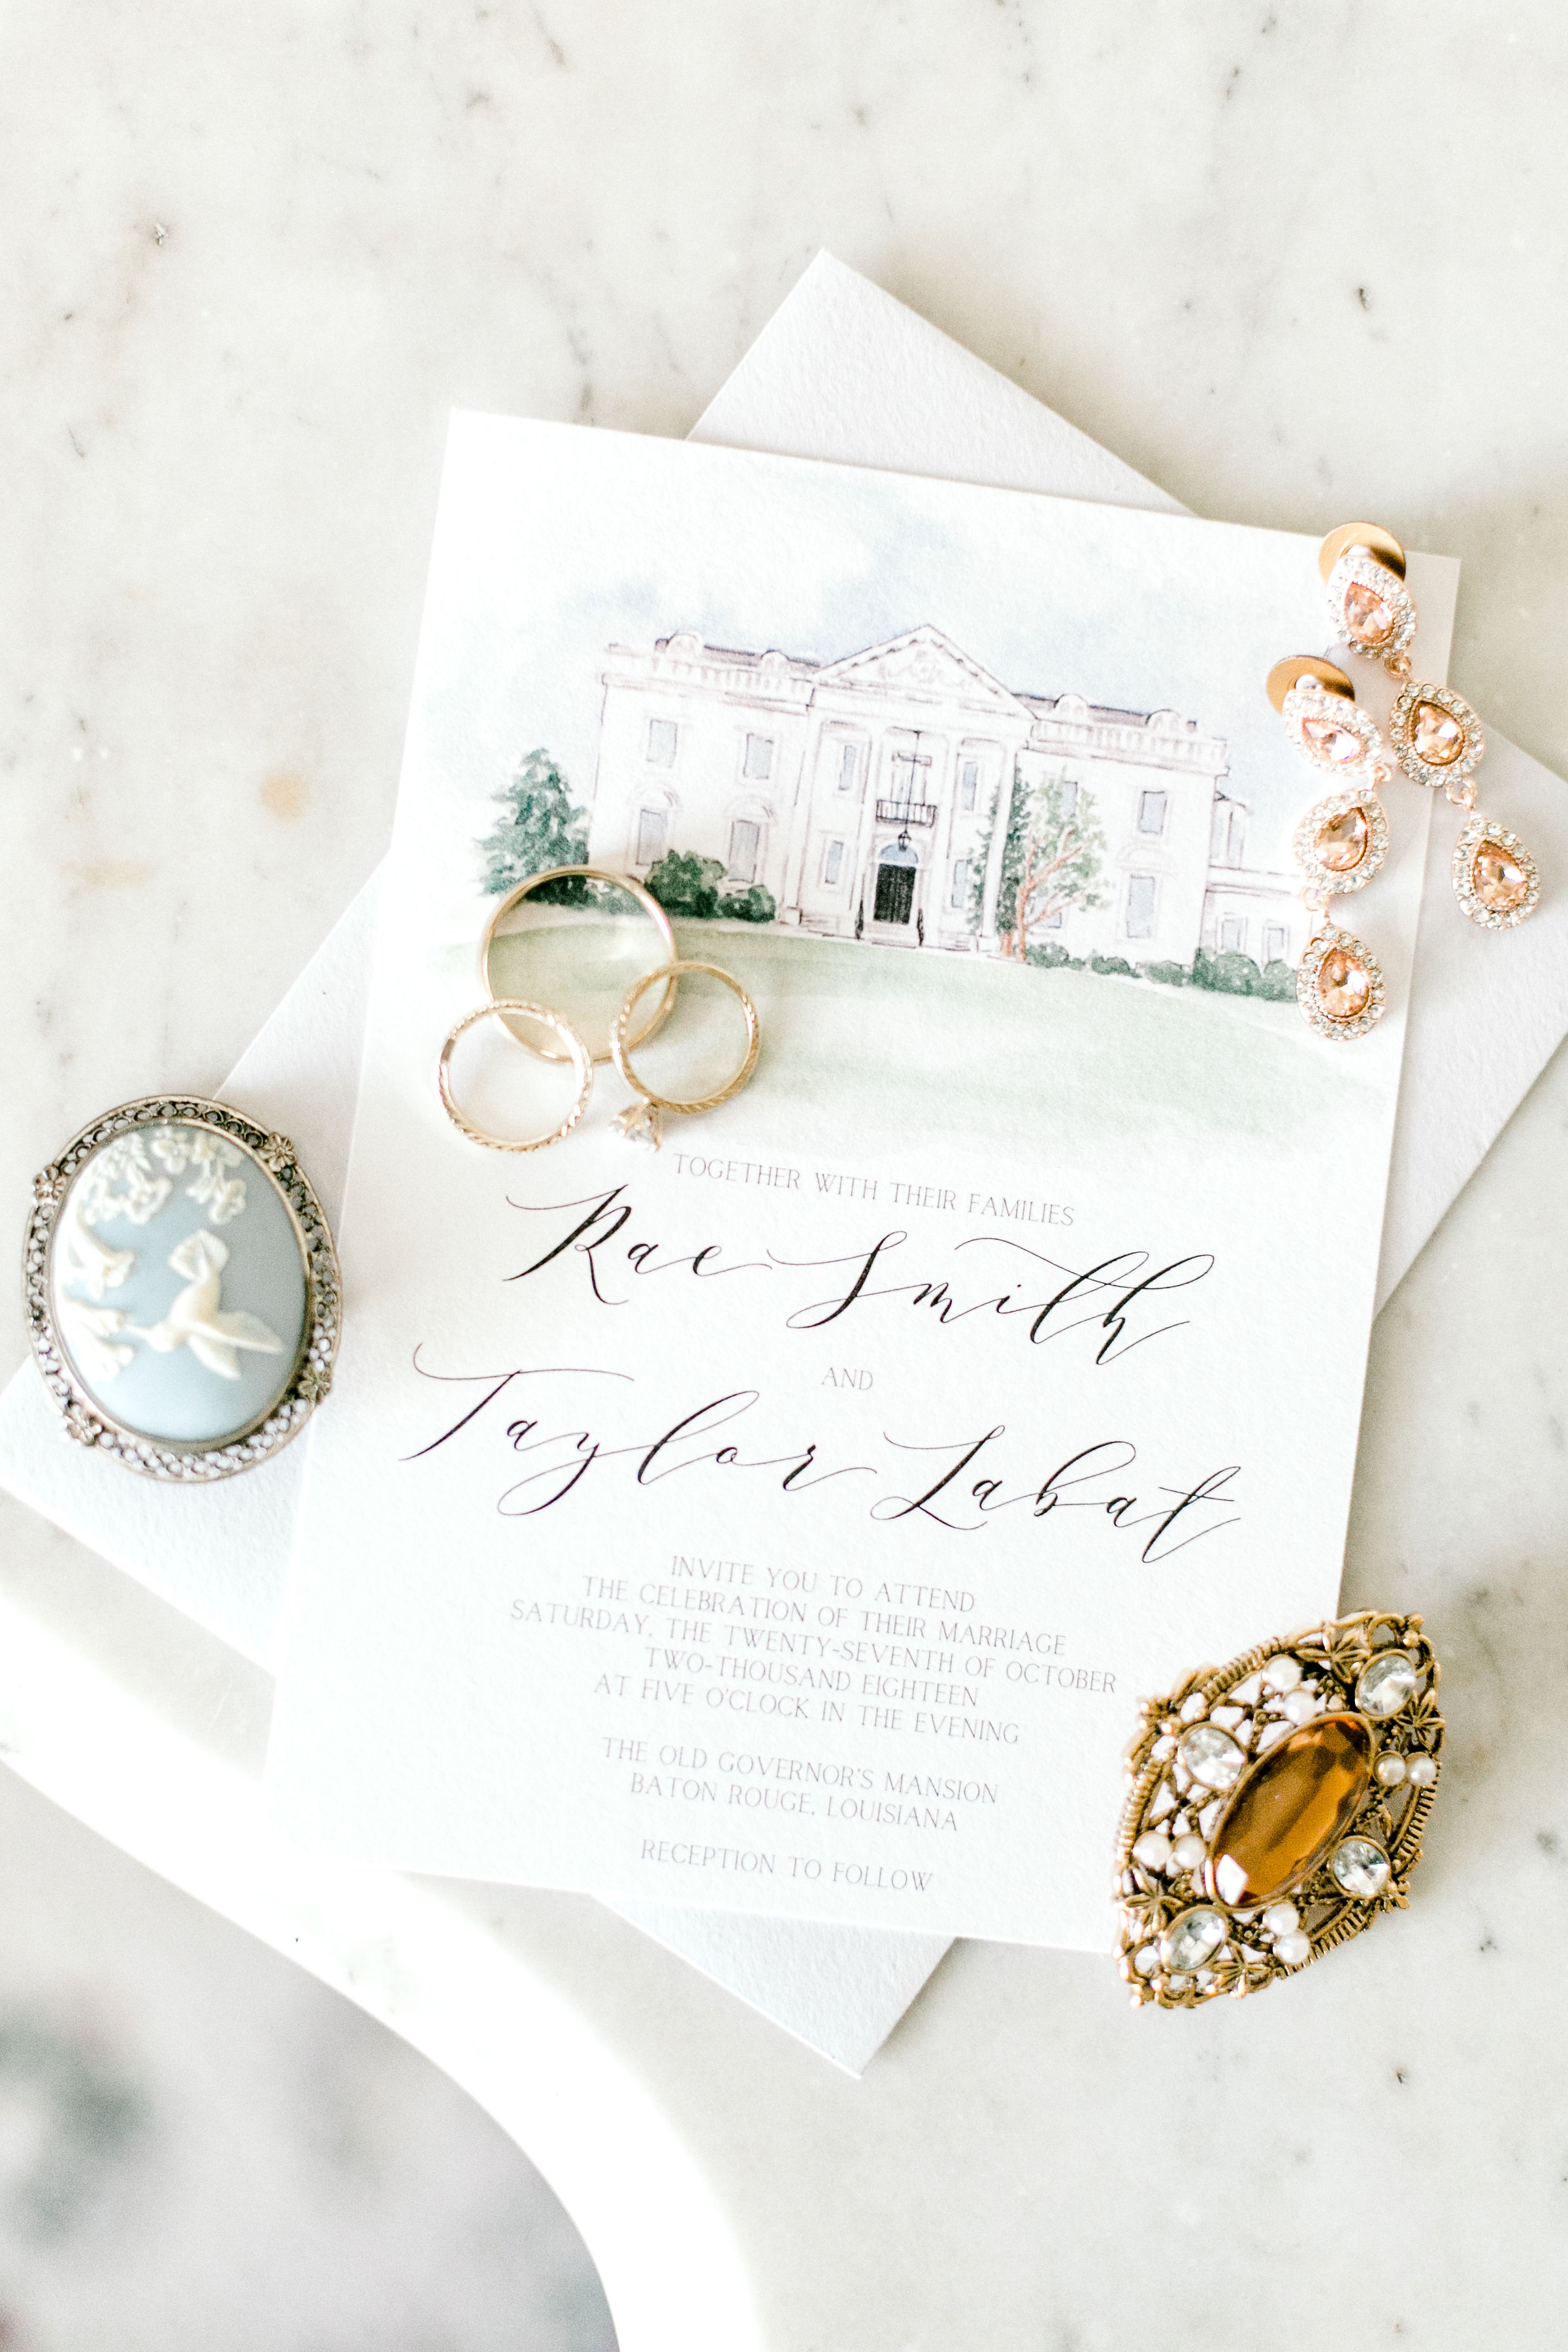
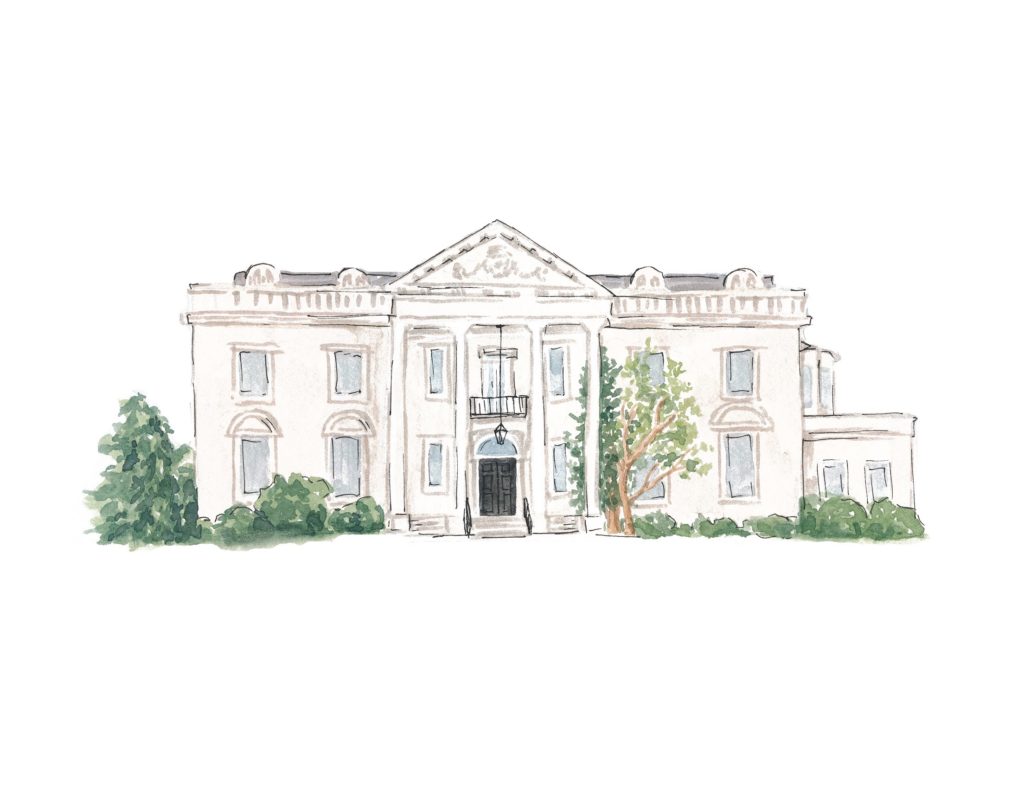
Now that you know what you want and how much you can spend, it’s time for the fun (aka scary) part: making them! My first step was getting the watercolor painting of my venue. I commissioned Sarah from Lily and Hue on Etsy and I am still totally in love with it. she made the process so easy. I sent her a couple pictures of our venue to work with and within a couple weeks she emailed my the first proof. I was able to ask for any adjustments to be made and she then sent over the final painting. She sent it in various file types and even included two different versions of the painting. She sent me the full painting with the sky and grass and a painting of the building only. I love her style of watercolor because it still has a very real look while still looking light and “watercolor-y”. I could really go on for days about how awesome it is.
You can definitely use pre-programmed fonts for your invite, but I recommend downloading your own fonts. This will make your invitation look more professional and unique. You can find a ton of free fonts online, but I actually purchased mine through Creative Market. When you purchase through Creative Market you’ll get a high quality font while supporting the person who created it. I chose to purchase a calligraphy font and a sans-serif font. You could also purchase just the calligraphy font you want and use a free font for the serif. I used this calligraphy font and this serif font.
You can use any design program you feel comfortable with the design your invitations, but I used Microsoft Word. I know there’s some people out there that will probably cringe at that, but hear me out. Nearly everyone has access to a computer with Microsoft Word already on it and knows how to use it. Of course if you have Photoshop or Illustrator or any program you like to use, you could really use any of them. I would just recommend using something you’re already familiar with so you don’t waste your time trying to figure out how to do everything.
Using Microsoft Word is rather simple once you’re gotten your illustration and your fonts. Whenever you download fonts to your computer they will automatically appear in Word. You first step will be to resize your paper size. Most wedding invitations are 5×7, but you can do any size you like. Just make sure you’ll be able to find envelopes to match. When you resize your paper, keep in mind and margin requirements for printing. My printing service required a .25inch margin so my paper size was actually set to 5.5×7.5. After you’ve resized your paper type out the contents of your invititaion first in a text box. A wedding invitation should include:
- Who’s hosting
- A request to come to the wedding
- The names of the bride and groom
- The date and time
- The location
- Reception information
There are many different ways to word your invitation. It mostly depends on how casual or formal your wedding is. A lot of articles will try to tell you there’s a right way and a wrong way, but truthfully as long as you include the information listed about it doesn’t matter how it’s worded. No one will care if it doesn’t follow “proper etiquette.”
After you type out the invitation and change it to your font, start playing around with the sizing and spacing until you get it looking how you want. Then if you have an illustration, insert it and center it. You’ll probably need to move your text some which is why you put it in a text box. After you have your invitation exactly how you want it, save it as a PDF. This will prevent your fonts and spacing from getting messed up in the printing process.
Follow these same steps for any additional cards you’re making. The only other enclosure I had was the RSVP card, but you might also want an additional information card, accommodations card, or directions card.
The Printing
When it comes to printing your invitations, you want to make sure you’re using a reliable service. Print quality will totally make or break the outcome of your invitations. The good news is you have options. If you have a reliable, high quality printer at home you can definitely print your invitations yourself. You can also use a local print shop. Or what I did, use an online printing service. My biggest determining factor what the paper options available. A lot of online print services only have a handful of paper options (standard letter and card stock papers usually). Paper and More had a HUGE selection of paper that you could buy, and they also offered printing services.
I knew I wanted a thick paper with a little texture, but I didn’t know much else. I ordered several samples and ended up liking the #118 cotton card stock in bright white the most. Cotton card stock has a very soft look to it that really complemented my watercolor painting. The cost of printing included the paper and I was able to have them cut my invites to the appropriate size. It made the process SO EASY and I was so happy with how they turned out. The quality was great and I didn’t have any problems with shipping.
One last thing to consider when ordering your invitations is how many to order. Keep in mind that not every person on your guest list will get an invitation. Go through and group people into couples and families that will get one invitation. After you’ve come up with your new number, always add some extras! You do NOT want to order the exact amount of invitations you need. Have extras in case some get messed up or there’s last minute additions to the guest list. Also, you’ll want a couple to keep as a keepsake for yourself.
The Extras
After you’ve got your invitations (and RSVP cards) printed, you’ll still need a few more things. You obviously need envelopes to mail your invites, but have you considered inner and outer envelopes? For a more formal wedding invitation suite you would have an inner envelope that addresses your guests more casually, and an outer envelope with the formal names and address. I decided to forgo the inner envelope to cut costs and save time with addressing. You also need to include envelopes for your guests to send back their RSVP cards.
When it comes to stamps, you’ll probably need more than your typical forever stamp. Because your invite is usually printed on heavier paper and includes inserts and extra envelopes, they usually weigh over the one ounce limit. You can either weigh your full invitation (inserts and envelopes included) at home with a kitchen scale, or you can bring it to the post office and have them weigh it. I weighed mine at home and ordered all my stamps through the post office website (because I’m too lazy to go to the post office TWICE). Again, don’t forget stamps for your RSVPs! If you want people to send them back to you you need to make the process as easy as possible. That means including a pre-addressed envelope AND a stamp.
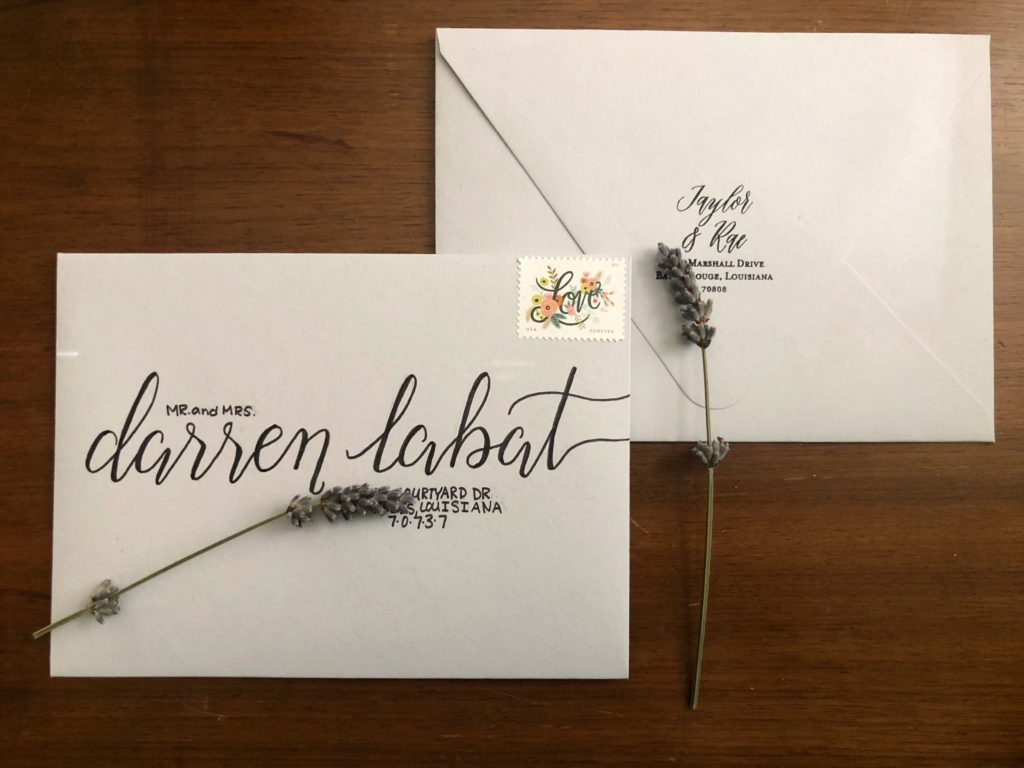
At this point there’s only one thing left to do, and that’s address your envelopes. You can hire someone to do the calligraphy for you, but it’ll cost at least $1 an envelope and it adds up quickly. I decided to address them myself. At the beginning of my wedding planning process I had NO experience with hand-lettering, but I knew it was something I wanted to learn. I purchased a calligraphy worksheet set from The Postman’s Knock and practiced my faux calligraphy. That’s right, I did faux calligraphy. It was much easier to learn in a short amount of time and allowed more room for error. I’m not going to lie, this is a very time consuming task. It’s been six months since my wedding and I still have no desire to address another envelope anytime soon.
Of course you don’t have to do calligraphy when addressing your invitations. You could simply write in cursive or even print. You can also purchase address labels from Etsy or Shutterfly, or even make your own! You can purchase blank sticker sheets and then print everyone’s addresses (using your fonts you already purchased) onto them.
I bet you thought you’d be done after you finished addressing your envelopes, but you’re not. You have to include your return address on every single one. AND on the RSVP envelopes. I HIGHLY recommend you invest either in a stamp with your address or some return labels. It will save you so much time and I promise you’ll get your money’s worth.
Check out some other posts from my wedding series:
Wedding Series Announcement (with pictures!)
How I Planned my Wedding by Myself
What to Buy from Etsy for Your Wedding
And be on the look out for my final post with ideas on how to plan your wedding in your bullet journal!